Add Leave
Schedule staff shifts around leaves, maintain service quality during absences
Add Leave
Purpose: Allow managers to log and approve staff leave days with optional remarks and tracking.
- Navigate to the Staff section in the main dashboard.
- Click on the “Leave” tab located in the top navigation.
- On the Leave page, click the “Add Leave” button on the top-right.
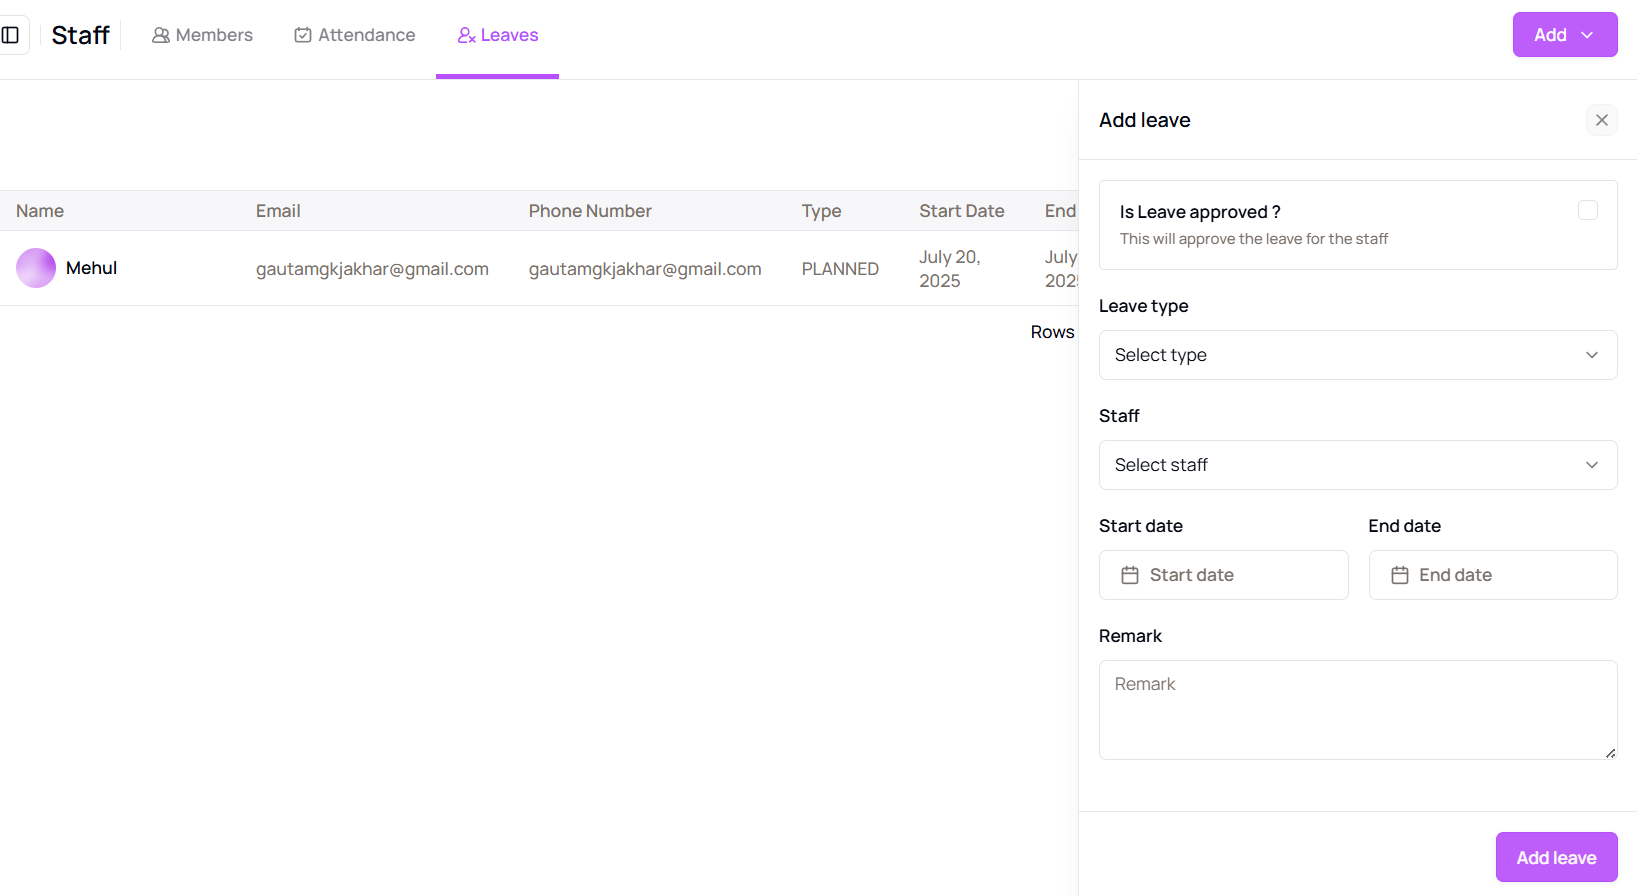
- A side panel will appear. Check the box for “Leave Approved” if applicable.
- Select the Leave Type (Planned or Taken).
- Choose the Staff Name from the dropdown.
- Enter the Start Date and End Date of the leave.
- Optionally add Remarks.
- Click “Add Leave” to save the entry.
Tip for First-Time Users:
Use remarks to note reasons or special cases—makes tracking and approvals easier.
More questions about this
Q1. Can I edit or delete a leave later?
Yes, go to the Leave tab and click on the specific leave record to edit or remove it.
Q2. Do staff get notified when leave is added?
Notification preferences can be set from the Message Center if staff alerts are enabled.