Add Appointment from Client Page
Saves time! No need to search the client again when booking—it’s all linked and ready to go.
Add Appointment from Client Page
Purpose: Quickly create a new appointment directly from an individual client’s profile page.
-
Go to the Clients Page
From the dashboard, navigate to the Clients page. -
Locate the Client
Find the client you want to book for, then click the three-dot menu on their row.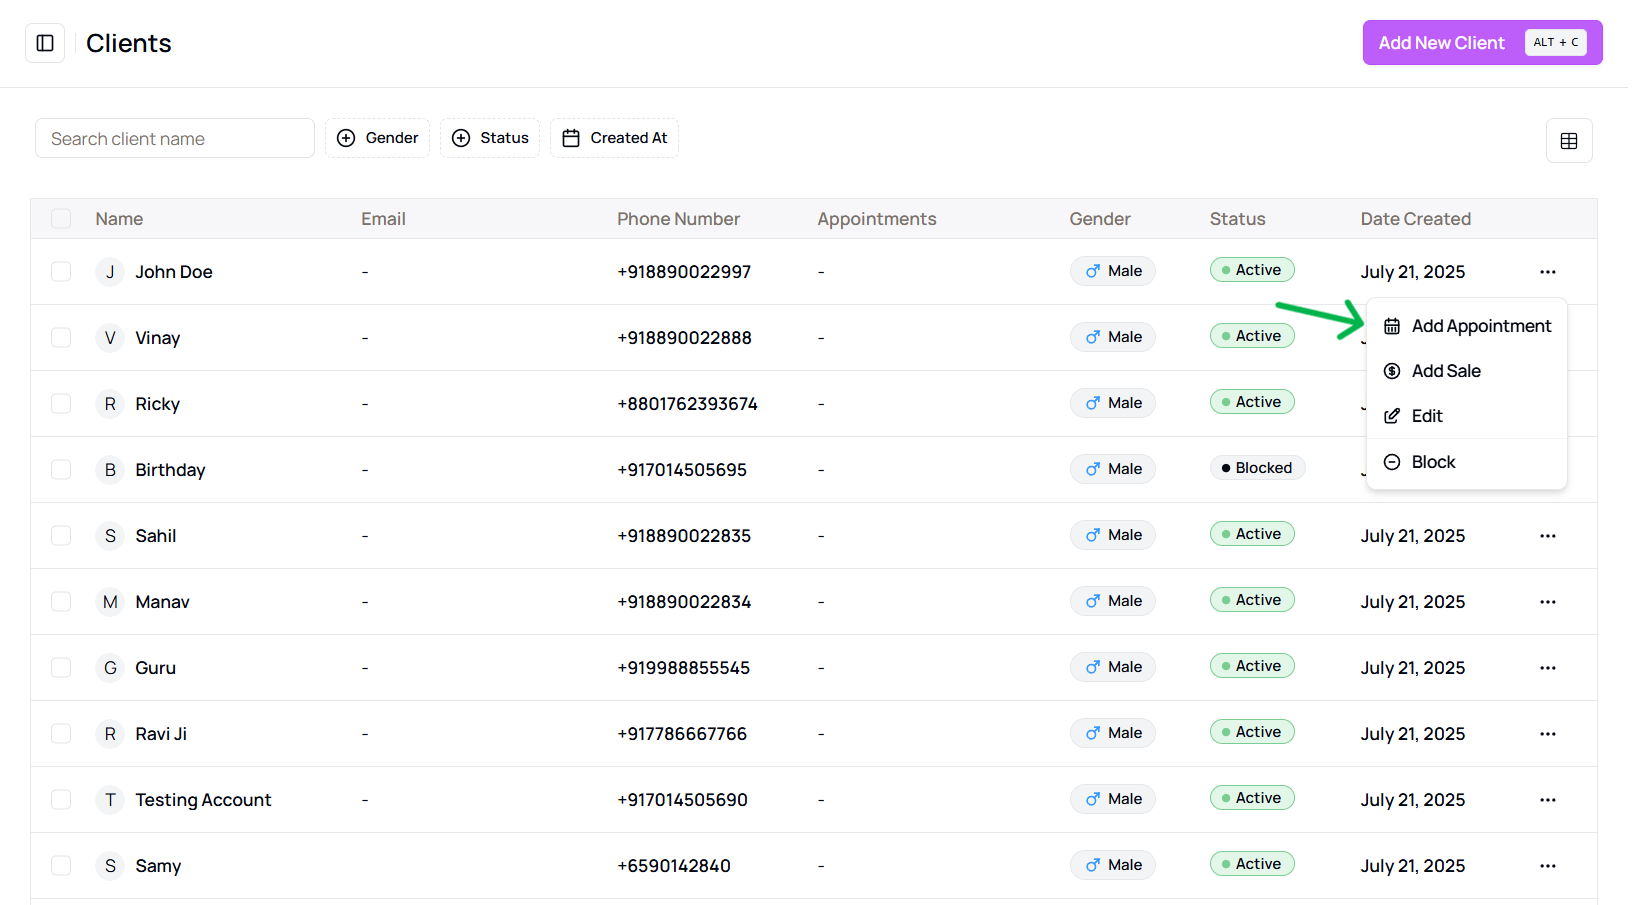
- or You can also find this option from the client details view
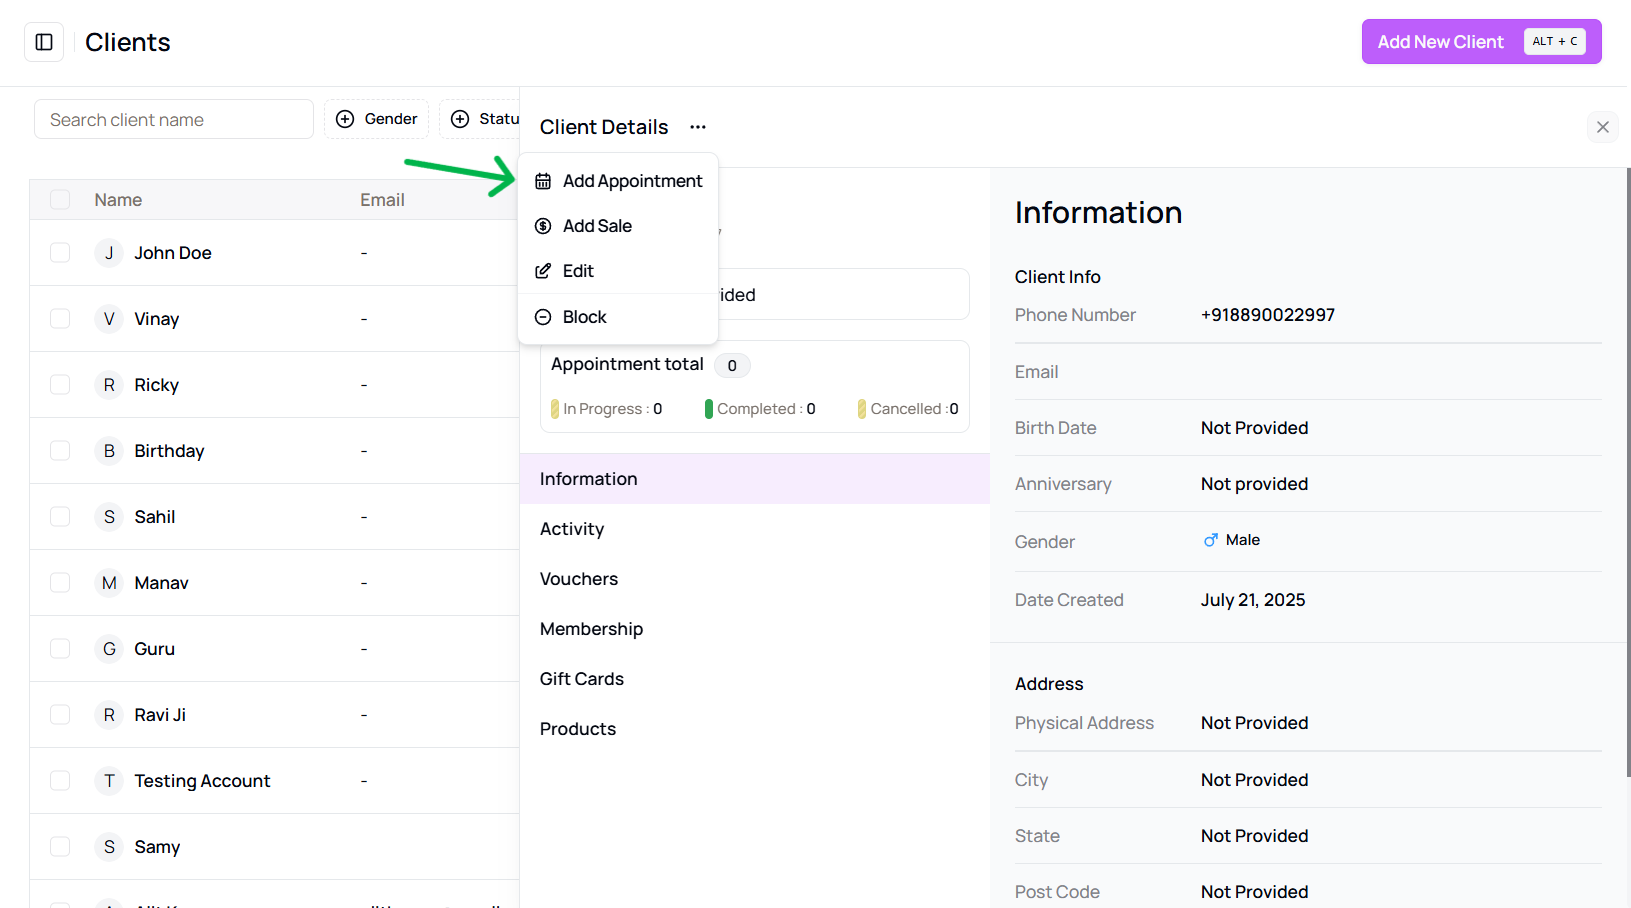
- or You can also find this option from the client details view
-
Select “Add Appointment”
Choose “Add Appointment” from the dropdown menu.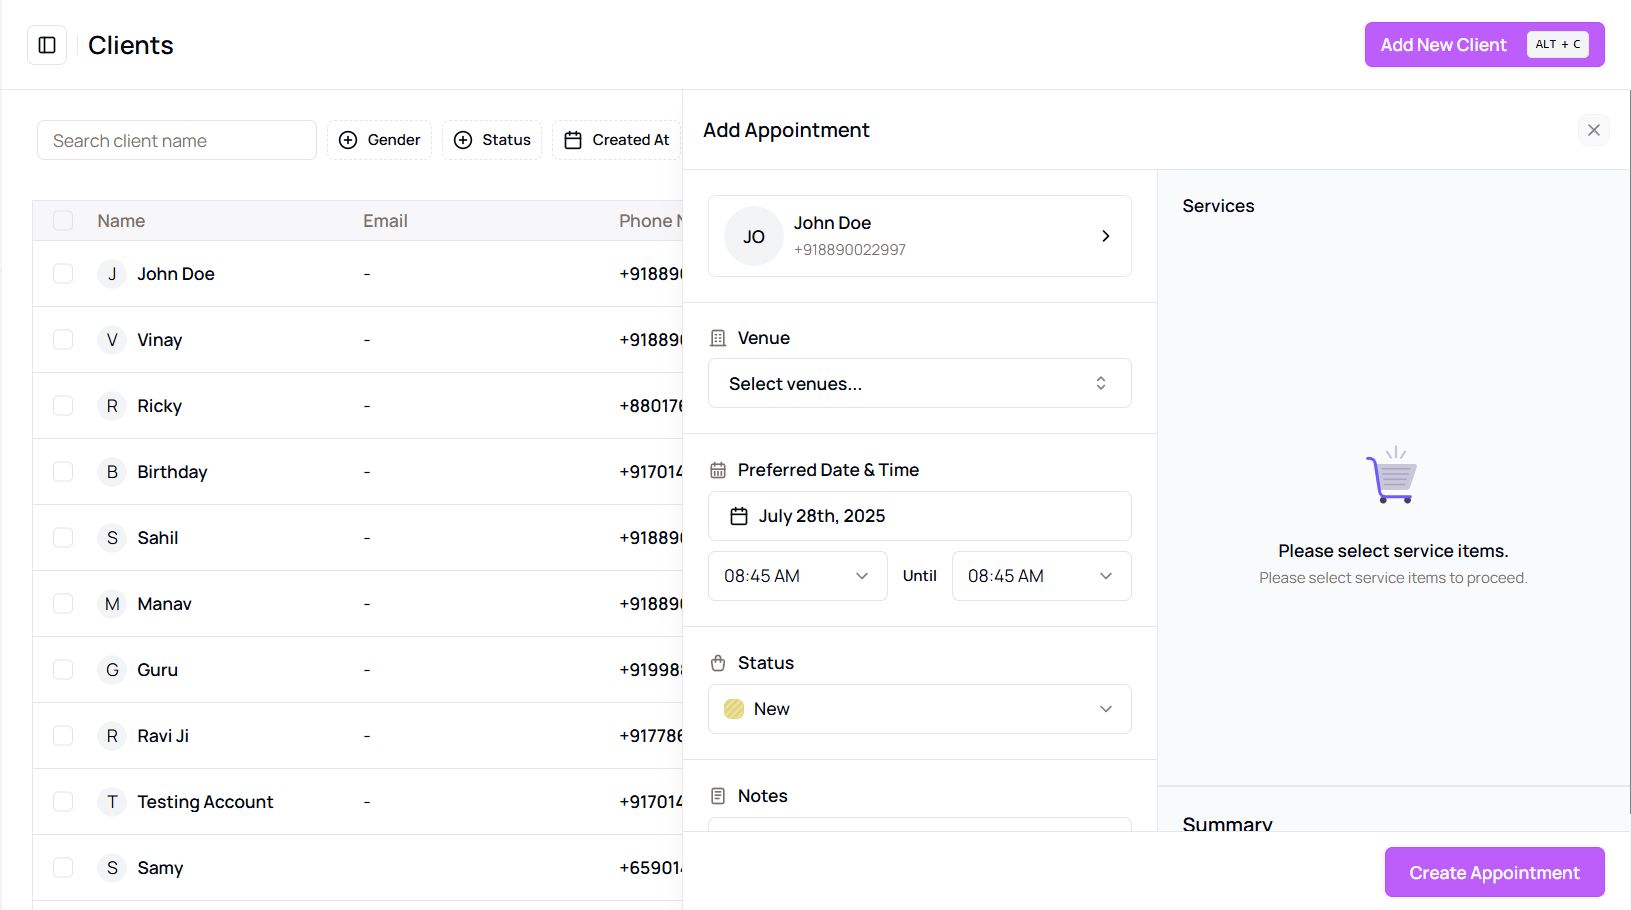
-
Fill in Appointment Details
The Appointment Creation Panel will appear on the right. Enter:- Venue
- Date and Time
- Services
- Assigned Staff
- Status (New, Confirmed, etc.)
-
Create the Appointment
Click “Create Appointment” once all details are completed. -
Confirmation
A success message will appear, and the client’s appointment count will be updated.
Tip for Staff:
This method is especially useful when handling a client query over phone or chat and booking in real time.
More questions about this
Q1. Can I edit the appointment after creating it?
Yes, go to the Calendar or Appointments section to edit any appointment.
Q2. What if I don’t see the “Add Appointment” option?
Make sure the client exists in the system and you have the correct permissions.