Add Sale from Client Page
Track wallet balances, issue store credits, and manage client loyalty rewards or points directly from their profile.
Add Sale from Client Page
Purpose: Quickly create a new sale directly from an individual client’s profile page.
-
On the Clients Page
Find the target client and click on the three-dot menu next to their row.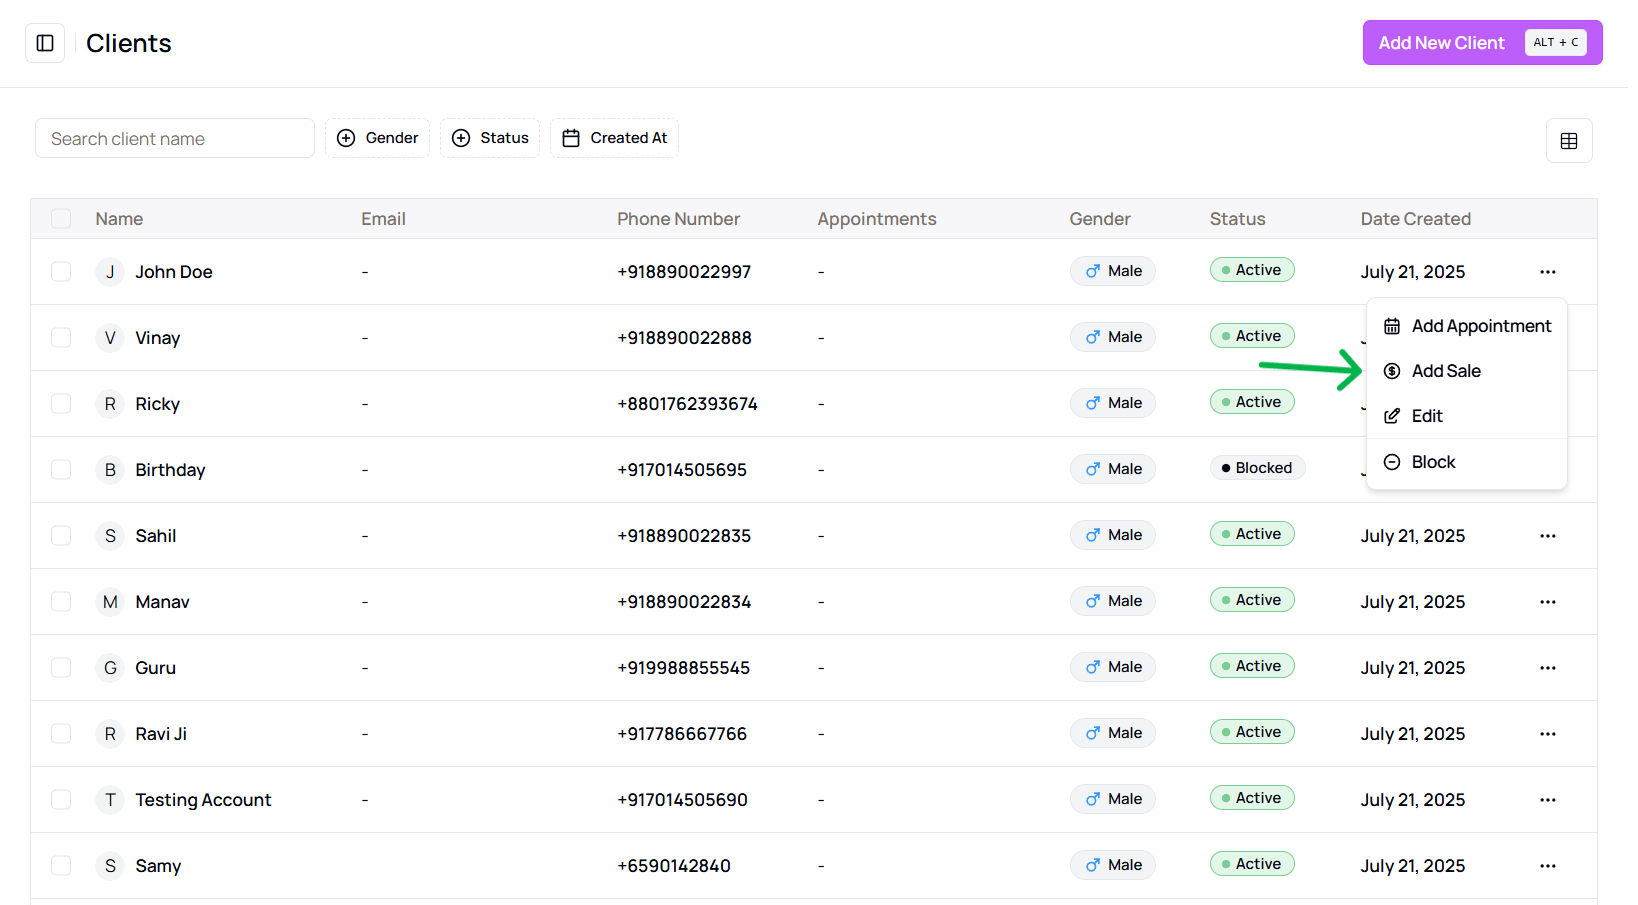
- or You can also find this option from the client details view
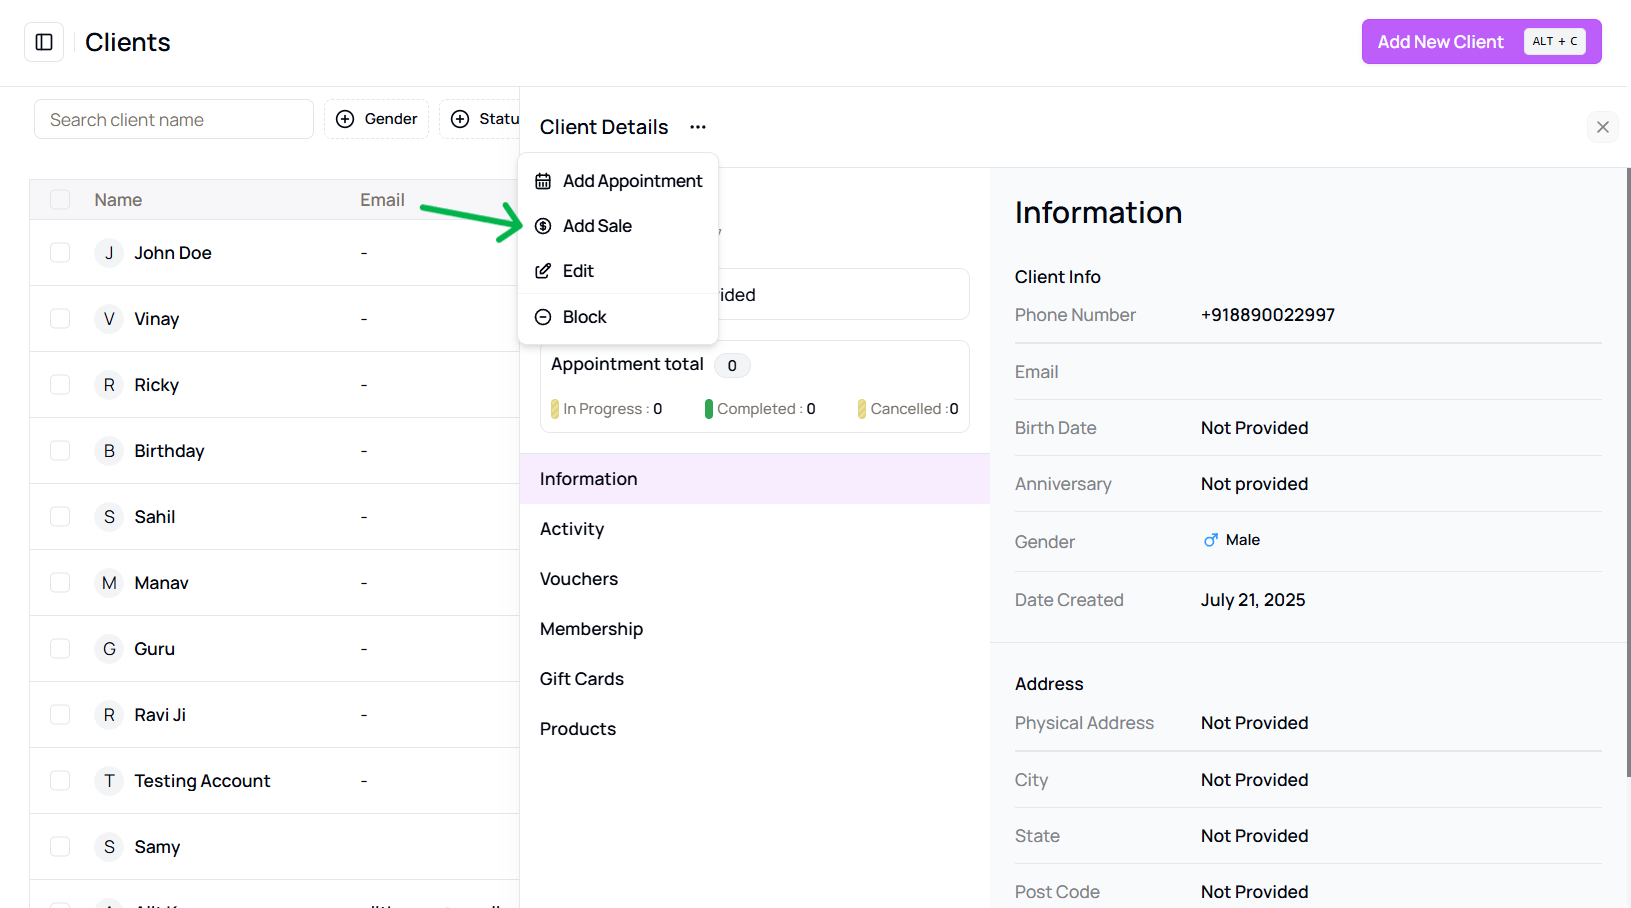
- or You can also find this option from the client details view
-
Choose “Add Sale”
This will open the sales creation panel with the client’s details pre-filled.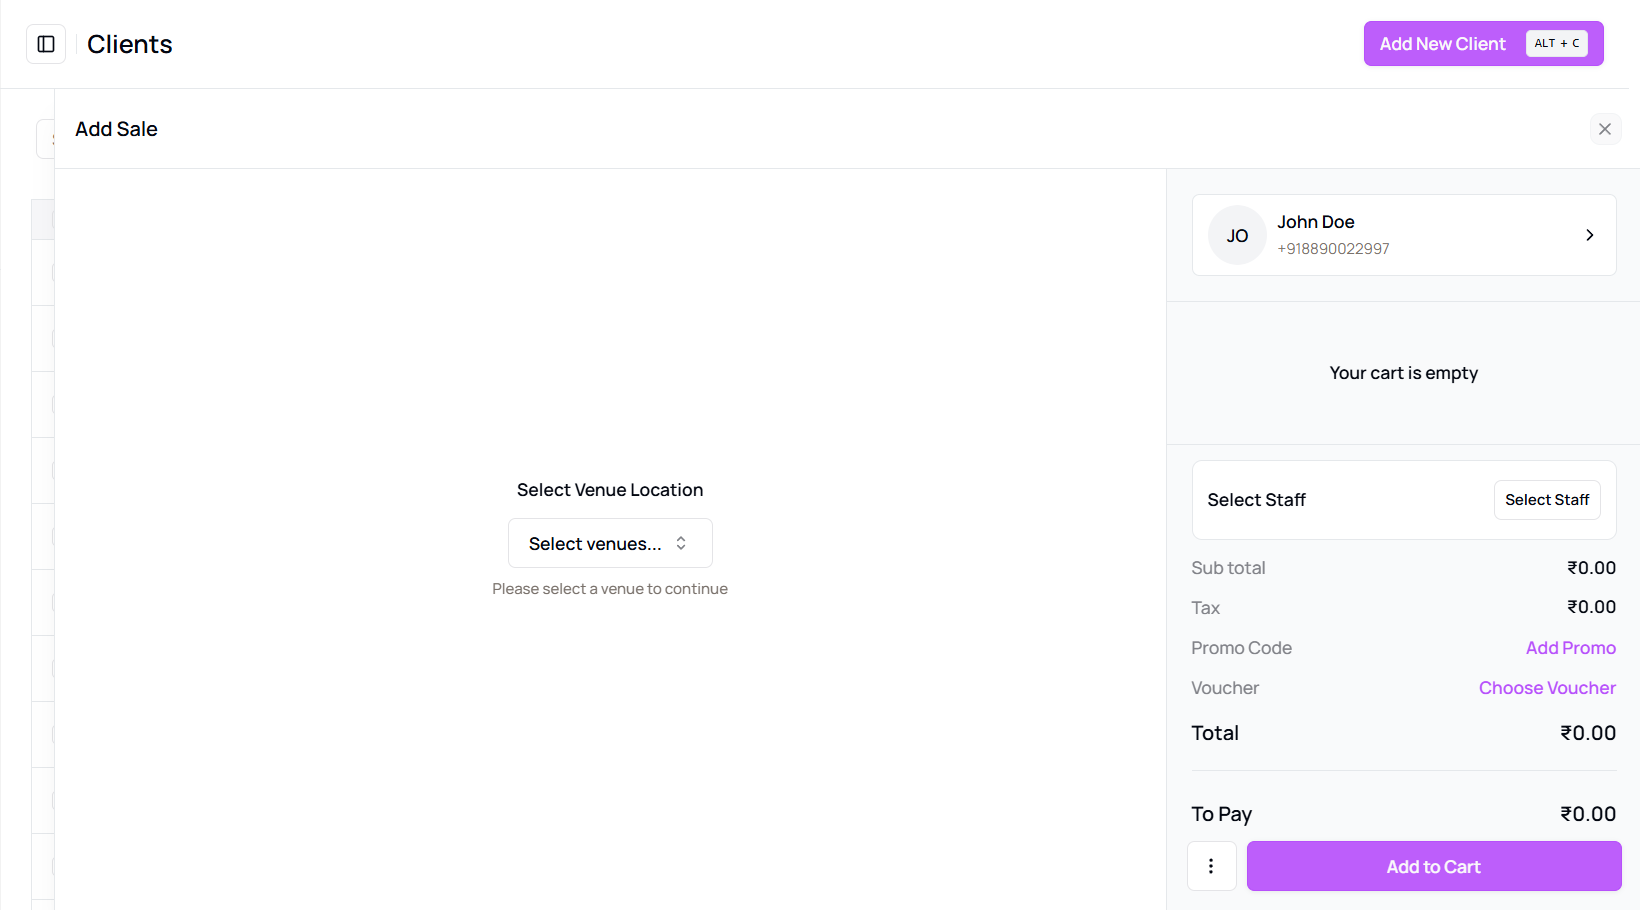
-
Select Sale Items
Choose from:- Appointments
- Products
- Services
- Vouchers
- Memberships
- Gift Cards
-
Add Items to Cart
Apply any discounts or promo codes, if available. -
Select Payment Method
Options include:- Full Payment → Paid
- Partial Payment → Partially Paid
- No Payment → Unpaid
-
Complete the Sale
Click Continue & Complete Payment or save the sale. -
Confirmation
A success message will appear indicating the sale has been added successfully.
Tip for Front Desk or Sales Team:
Adding sales from the client’s page speeds up transactions, especially during upselling or walk-ins.
More questions about this
Q1. Can I edit the sale later?
Yes, sales can be edited or refunded from the Sales History tab.
Q2. What happens if I select no payment?
The sale will be saved as unpaid and can be paid later or tracked in receivables.